Before installing a new timing belt, it's worth asking yourself these questions:
- Is this a general maintenance procedure or is the old timing belt broken?
- If the old belt is broken, is the engine fully operational?
- Have you previously installed a timing belt on this engine?
- Do you have up to date installation instructions and tension specifications from the vehicle manufacturer’s service manual?
- Do you have the necessary tools?
Your answers to these questions are very important. If the old belt was broken, the engine may have sustained damage that must be repaired prior to the installation of the new belt.
Smart packaging to help you do a good job
 Replacing a timing belt is a complex job that cannot be done without the use of dedicated tools that can vary from application to application. On our packaging you can find a reference to the required tools you need to install a timing belt correctly. Ask your supplier about the Gates range of professional tools.
As a professional you know that the procedure for installing a timing belt is not the same on every engine. For this reason, we offer engine-specific instructions inside most of our boxes.
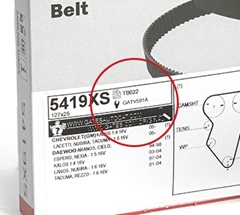
For some difficult drives or recurring problems we offer Technical Bulletins. Our timing belt boxes also indicate if a bulletin is available. You can read or download all our technical bulletins here.
In most cases, as well as replacing a worn timing belt, all of the other metal components will need to be replaced. A complete timing belt kit offers a solution. It is more efficient to replace the tensioner and idlers and even the water pump when the engine is already demounted. Check our online catalogue to find the matching timing belt kit or timing belt kit with water pump for your application.
What follows is a general step-by-step procedure for installing timing belts. Note that these are general guidelines. Carefully check the instructions of the vehicle manufacturer or our engine-specific instructions inside the box.
How to install a timing belt in 8 easy steps
STEP 1
- Make sure the timing marks are properly aligned
- Crankshaft pointer at TDC
- Distributor rotor aligned with timing mark on distributor housing
- Camshaft pulley timing pointer aligned with mark on engine block
STEP 2
Place the new belt over the pulleys, but be careful not to force it. Never reinstall a used timing belt, as tension values are calculated for new belts.
STEP 3
Loosen the tensioner adjustment bolt slowly, so that it can swing back against the belt. Be careful to ease the tensioner into position. Do not allow it to 'strike' the belt. Make sure the tensioner spring is engaged properly.
If there is no spring-loaded tensioner, tension the belt according to the vehicle manufacturer’s recommendations.
STEP 4
Rotate crankshaft (in the direction of normal rotation) at least two complete turns to remove any slack in the belt and to allow the teeth of the belt to seat themselves perfectly in the pulley grooves.
STEP 5
Loosen the tensioner and re-tension the belt according to the vehicle manufacturer’s recommendations. When the drive has a fixed tensioner, check the tension with the Gates STT-1 sonic tension tester. Torque the tensioner adjustment and pivot bolts to the manufacturer’s recommended torque setting.
STEP 6
Reinstall all of the parts that were removed. Reinstall the timing belt cover. All bolts must be torqued to the manufacturer’s recommended torque settings.
STEP 7
Reconnect the battery earth cable.
STEP 8
Start the engine, check the ignition timing and make any necessary adjustments.